A distributor-focused review of custom sleeve print map sizing and size grading, with practical production checks for decoration accuracy, consistency, and...
Custom Sleeve Print Size Grading for Buyers - Fabrikn production reference
Custom sleeve print map size grading is one of the quieter technical details that can decide whether a decorated apparel order looks retail-ready or inconsistent across sizes. For distributor buyers, promotional apparel programs, teamwear suppliers, and private-label brands, sleeve decoration is often sold as a simple placement: a logo down the forearm, a sponsor mark on the bicep, a small icon near the cuff, or a full sleeve graphic. In production, it is not simple.
A sleeve changes shape from size to size. It tapers, curves, twists slightly around the arm, and may stretch differently depending on fabric and construction. A print that looks balanced on a medium sample can look too low on a small, too short on a 3XL, or too close to the seam on a youth size. That is why buyers need a print map and size grading review before bulk production.
This guide explains how to review custom sleeve print sizing, what to request from a manufacturer, where common mistakes occur, and how distributor buyers can control risk before approving production.
Sleeve print size grading is the process of adjusting the size, position, or artwork layout of a sleeve decoration across garment sizes. The goal is to keep the print visually consistent when the sleeve dimensions change.
For example, a vertical sleeve logo may measure 280 mm long on a size medium hoodie. If the same 280 mm print is used on an XS, it may crowd the cuff or cross into the elbow area. On a 4XL, the same print may look undersized and float awkwardly in the middle of a larger sleeve panel. Size grading helps avoid that mismatch.
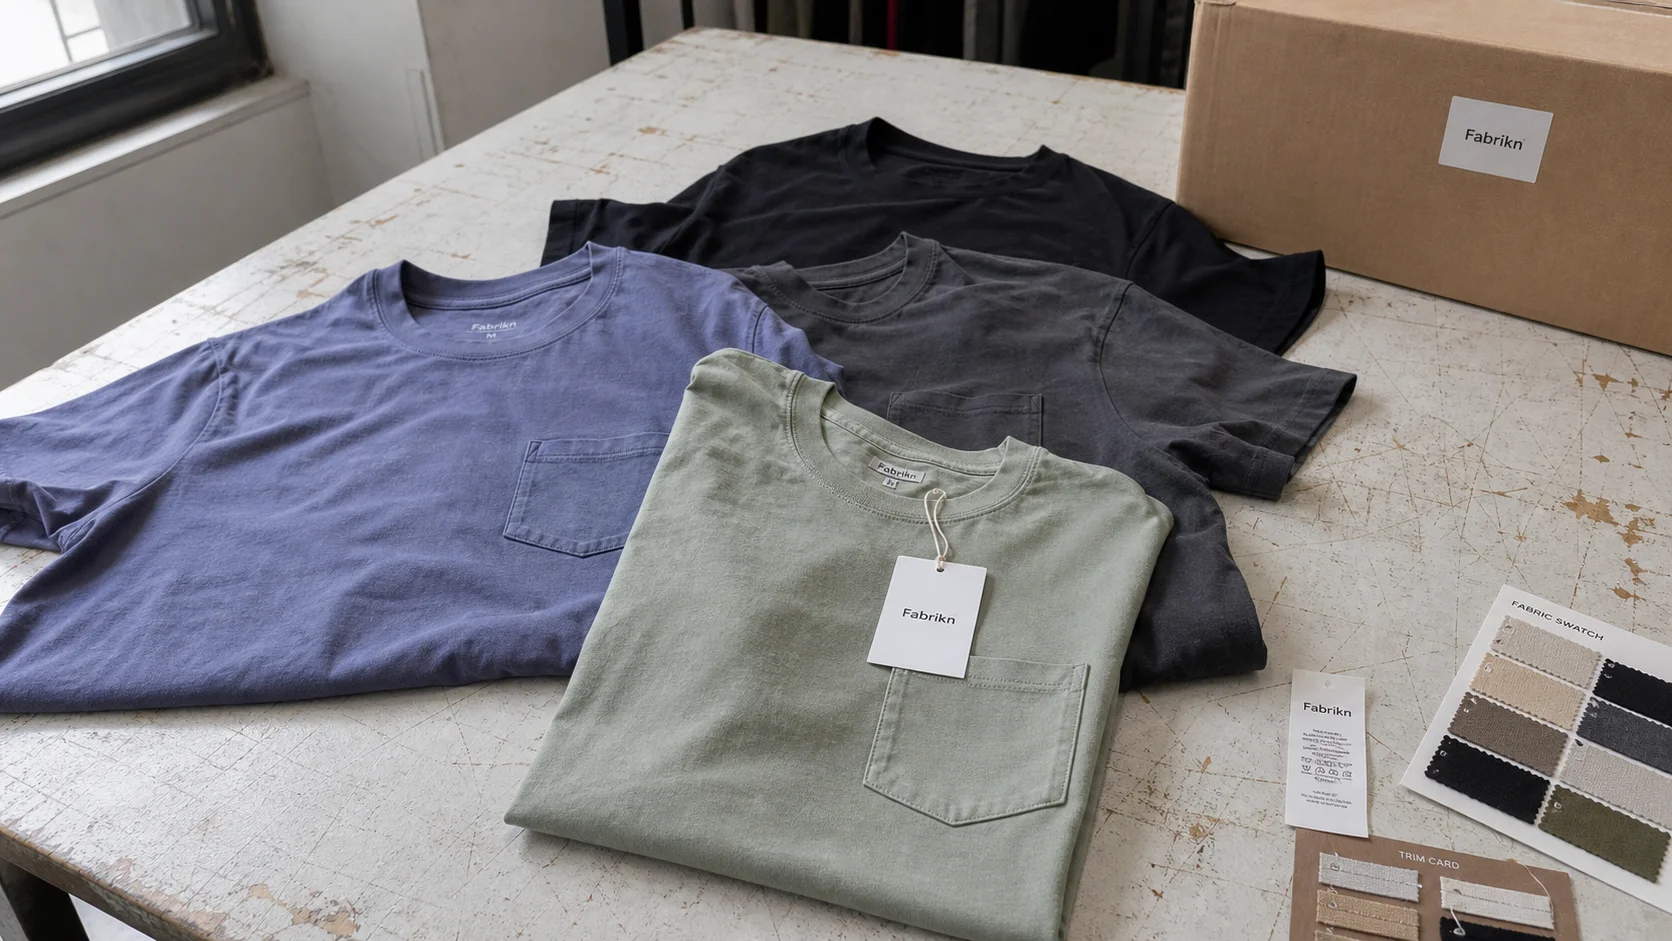
A custom sleeve print map usually includes artwork dimensions, placement points, distance from sleeve seam, distance from cuff or shoulder seam, print orientation, print method, approved colors, and size-specific adjustments. For distributor buyers, this document should be treated as part of the production specification, not as a loose visual reference.
Purchasing judgment: if the sleeve print is a key selling feature, do not approve bulk production from a front-view mockup alone. Request a sleeve print map with measurements for every size range being produced.
Distributor buyers often manage orders where the end customer cares about brand consistency but may not understand apparel production limitations. A school, company, sports club, event organizer, or merch buyer may expect the same sleeve graphic to appear identical across all sizes. The distributor has to translate that expectation into a workable factory instruction.
A sleeve print map reduces confusion between the buyer, decorator, pattern maker, cutter, sewing team, and quality control team. It also helps when the order includes mixed sizes, repeat orders, or multiple garment styles using the same artwork.
Without a print map, production teams may rely on a single sample or a general instruction such as “print logo on right sleeve.” That leaves too much room for interpretation. One operator may align from the cuff. Another may align from the shoulder seam. A third may center the artwork by eye. On a small run, the variation may be manageable. On a distributor order with hundreds or thousands of units, it becomes a complaint risk.
Buyers sourcing custom decorated apparel can review broader manufacturing and decoration capabilities through Fabrikn services, especially when planning programs that include printing, embroidery, garment development, or private-label trims.
Sleeve prints are not one standard placement. Each position has different grading concerns. A good review starts by identifying the exact sleeve zone and how the customer expects the mark to be seen when worn.
This is common on hoodies, long-sleeve T-shirts, performance tops, and streetwear. The artwork often runs from upper forearm toward the cuff. It may be a brand name, slogan, sponsor text, or repeated graphic.
The main risk is length. A print that is too long may hit the cuff seam, cross the elbow, or distort when the arm bends. A print that is too short may look weak on larger sizes. Orientation is also important. Buyers should specify whether the artwork reads from shoulder to cuff or cuff to shoulder.
This placement is used for small logos, patches, flags, and sponsor marks. The print usually sits on the outer upper sleeve and needs to be visible from the side.
The main risk is rotation. Sleeves are tubular and curved, so a small logo can shift toward the front or back if the placement point is vague. For cut-and-sew garments, printing before sewing may improve consistency. For finished garment printing, sleeve board setup and operator alignment become more important.
A small mark near the cuff can look premium when placed correctly. It is also sensitive to construction. Rib cuffs, thumbholes, coverstitch seams, and tapering can limit printable area.
The buyer should confirm the minimum distance from the cuff seam, print width limits, and whether the sleeve must be opened flat before printing. On fleece hoodies and sweatshirts, thick cuff seams may interfere with screen printing pressure.
Full sleeve prints may include repeated patterns, sublimation artwork, motocross-style graphics, teamwear designs, or fashion prints. These require stronger coordination between pattern, fabric shrinkage, artwork scale, and seam matching.
For full sleeve graphics, size grading is rarely optional. The print may need to be scaled by size, separated by panel, or engineered so critical design elements do not disappear into seams.
Garment grading changes sleeve length, sleeve width, armhole shape, and sometimes seam position. Decoration must respond to those changes. Buyers should not assume one artwork size fits all sizes.
There are three common approaches to sleeve print grading.
This is the simplest and often the cheapest option. The same screen, heat transfer, or digital file is used across all sizes. It can work for small logos, simple bicep marks, and low-MOQ distributor orders where cost control matters more than exact proportional scaling.
The tradeoff is visual proportion. A 75 mm logo may look large on XS and small on 3XL. For many promotional orders, that may be acceptable. For retail programs or brand-sensitive clients, it may not be.
This is often the most practical solution. Sizes are grouped into ranges, such as XS-S, M-L, XL-2XL, and 3XL-5XL. Each group uses a different artwork size or placement adjustment.
Grouped grading balances cost and appearance. It limits the number of screens, transfer sizes, or print setups while improving fit across the size run. Distributor buyers often find this approach useful when the order includes a wide size range but the budget does not support fully individual grading.
This gives the most controlled result. Each garment size receives a size-specific print dimension and placement instruction. It is common for engineered prints, sublimation panels, performance uniforms, and high-end private-label products.
The tradeoff is complexity. More artwork files, screens, transfers, setup checks, and inspection points are required. This may raise sampling costs, increase lead time, and create more room for packing or production mix-ups if the factory is not disciplined.
Grading Approach Best For Buyer Advantage Main Risk One print size Small logos, low-cost promo orders, narrow size ranges Lower setup cost and simpler production Print may look disproportionate on extreme sizes Grouped print sizes Distributor programs, hoodies, long-sleeve tees, teamwear Good balance of appearance and cost Requires clear size grouping and inventory control Individual size grading Engineered prints, sublimation, retail-quality programs Best visual consistency Higher development cost and more inspection pointsA sleeve print map should include measurable instructions. Visual mockups are useful for presentation, but production needs numbers.
Confirm the exact print dimensions in millimeters or inches. Buyers should specify whether dimensions refer to the full artwork bounding box, visible printed area, or repeated pattern section. This matters when artwork contains transparent space, distress effects, or separated letters.
For forearm and cuff-area prints, the distance from the cuff seam is one of the most important measurements. A typical minimum may be around 25 to 50 mm from the cuff seam for many screen print or transfer applications, but this depends on sleeve construction, print method, and equipment access.
Rib cuffs, elastic cuffs, thumbholes, and heavy seams may require more clearance. If the print gets too close to the cuff, registration and pressure can become inconsistent.
For upper sleeve prints, measure from the shoulder seam or armhole seam to the top or center of the print. On raglan sleeves, the reference point may be different from a set-in sleeve. Raglan styles need careful review because the seam angle changes the visual balance.
Most sleeves have an underarm seam, side seam continuation, or sleeve seam that can be used as a reference. The print map should say whether the artwork is centered on the outer sleeve, offset from the seam, or aligned to a sleeve fold line.
A phrase like “centered on sleeve” may not be enough. The factory needs to know how the center is determined when the sleeve is tubular.
Sleeve graphics can rotate unintentionally around the arm. A buyer should confirm whether the print sits on the outside of the arm when worn, along the top fold when laid flat, or along a measured angle from the seam.
This is especially important for bicep logos and vertical wordmarks. Small rotation differences may be visible when garments are displayed side by side.
The print map should identify which sizes share the same print and which sizes receive adjusted dimensions. If the garment size range includes youth and adult sizes, separate maps are usually safer. Youth sleeves are not only shorter; they may have different proportions.
Measurement Why It Matters Buyer Review Point Print width and height Controls artwork scale Check if the size is proportional across XS to 5XL Distance from cuff Prevents crowding and print distortion Confirm clearance from rib, seam, or thumbhole Distance from shoulder seam Controls upper sleeve balance Use a clear reference point for raglan or set-in sleeves Distance from sleeve seam Controls side-to-side placement Avoid vague instructions such as “on sleeve side” Rotation angle Keeps the print visible when worn Confirm the print is not drifting toward front or backThe decoration method affects how sleeve print grading should be planned. Buyers should review print size and placement together with the printing process, not after the method is already locked.
Screen printing is common for sleeve text, logos, and bold graphics. It can be cost-effective for medium to large runs, especially when artwork colors are limited. For sleeve printing, setup is more sensitive because the sleeve may need a narrow platen or special sleeve board.
Each print size or artwork variation may require separate screens. That makes fully graded sizing more expensive. Buyers should ask whether grouped print sizes can be produced with shared screens or whether each group needs a new screen.
Inspection risks include off-center placement, ink buildup near seams, cracking if ink is not matched to stretch fabric, and inconsistent pressure on tapered sleeves.
Heat transfers work well for logos, names, numbers, sponsor marks, and smaller runs. They allow multiple artwork sizes without the same screen cost burden, although transfer cutting, storage, and application control still matter.
Sleeve transfers need correct heat, pressure, and dwell time. Heavy seams, rib cuffs, or uneven surfaces can cause lifting. Stretch fabrics may require stretch-compatible transfers. Buyers should ask for wash test expectations and application specs, particularly for performance apparel.
Direct-to-film transfers are used frequently for multi-color artwork and lower MOQs. They can support sleeve graphics with fine detail and color gradients, depending on artwork and supplier capability.
The tradeoff is hand feel and durability. Larger sleeve prints may feel heavier or less breathable. For distributor buyers, DTF can be useful for flexible order quantities, but the buyer should review wash durability, color fastness, and edge feel before approving a large program.
Sublimation is often used on polyester performance apparel, full-sleeve graphics, team uniforms, cycling jerseys, and sportswear. It works best on polyester or polyester-rich white or light base fabrics.
For sublimated sleeves, print map grading is usually built into the garment pattern. The artwork may need to be scaled and positioned for each panel size. Risks include seam mismatch, shade variation, white creasing, and distortion if the panel is stretched or cut inaccurately.
Although the focus here is print, some buyers compare sleeve printing with embroidery or applique. Sleeve embroidery can work for small upper-arm logos but is less suitable for long forearm graphics. It may also be uncomfortable on lightweight sleeves if the backing is heavy.
When embroidery is used, size grading usually means placement adjustment rather than artwork scaling. Logo size may remain fixed, while the position changes by garment size.
Sleeve print grading is not only about artwork. Fabric weight, stretch, shrinkage, sleeve construction, and trim details influence the result.
Lightweight jersey may shift during printing and show more distortion. Heavy fleece may be harder to load onto sleeve boards. A 160 gsm cotton long-sleeve tee and a 350 gsm fleece hoodie should not be treated as the same printing surface.
Buyers should confirm fabric weight, composition, and surface texture before approving artwork size. A fine text print that works on smooth cotton may lose sharpness on brushed fleece.
Performance fabrics, ribbed sleeves, and elastane blends stretch around the arm. Prints must be compatible with stretch. If not, cracking, peeling, or distortion may occur after wear and washing.
For stretch sleeves, the print size may look different on a flat sample than on a worn garment. A wear-fit review can be useful for high-visibility sleeve graphics.
Fabric shrinkage affects both garment measurements and print placement. If garments are printed before washing or finishing, the final print position may change. If panels are printed before sewing, cutting and sewing accuracy become critical.
Buyers should ask whether the fabric is pre-shrunk, garment washed, or expected to shrink after home laundering. Shrinkage tolerance should be considered during sample approval.
Trim and construction details create hard limits on printable area. Sleeve pockets, reflective tape, cuff ribs, coverstitching, thumbholes, contrast panels, and elbow patches can all interfere with print placement.
A sleeve print map should show these features. If the artwork crosses a seam, confirm whether the print method can handle it. Many print methods do not perform well over bulky seams.
Buyers developing custom garments with specific sleeve trims or private-label construction can review company capabilities and sourcing focus through Fabrikn’s about us page.
A disciplined sample process prevents expensive production disputes. Sleeve print problems are often visible in early samples, but only if the buyer requests the right review materials.
Start with production-ready artwork files. Vector artwork is preferred for logos and text. The tech pack should include garment style, size range, fabric, color, sleeve construction, print method, print colors, and intended placement.
At this stage, the buyer should decide whether the print will use one size, grouped sizing, or individual size grading. Waiting until after sample approval can cause delays and extra setup costs.
The supplier should prepare a digital print map with measurements. This map should show each size or size group. It should include artwork dimensions, placement reference points, orientation, and any notes about seam clearance.
Buyers should review the map against the actual garment measurement chart. If the sleeve length increases by 40 mm between size S and XL, but the print length stays the same, that may be acceptable or may look undersized. The decision should be deliberate.
A strike-off checks ink, color, hand feel, opacity, registration, and basic print quality. For sleeve prints, a flat print test may not be enough. A test on actual fabric is more reliable, especially for fleece, rib, stretch jersey, or polyester performance fabric.
Color approval should reference Pantone, lab dips, or approved physical standards where possible. Digital color alone is risky because screen settings and lighting conditions vary.
The buyer should review at least one physical garment with the sleeve print applied. For broad size ranges, samples in a mid-size and an extreme size are useful. Common pairings include M and 2XL, or S and 3XL, depending on the order profile.
If the order includes youth and adult garments, review both. Do not rely on an adult medium to approve youth sleeve placement.
The pre-production sample should reflect final fabric, trims, sewing, print method, artwork size, placement, and labels. This is the control sample for bulk production.
For high-value distributor programs, buyers should approve the pre-production sample in writing and keep a record of the print map, photos, and measurement tolerances.
Bulk should proceed only after the buyer approves the final print map and sample. Any change in fabric, sleeve pattern, artwork, print method, or size range should trigger another review. A small sleeve pattern change can shift the print more than expected.
MOQ and lead time depend on garment type, print method, fabric sourcing, factory capacity, number of colors, and grading complexity. Buyers should treat any estimate as conditional until artwork, size range, and specs are confirmed.
For decorated stock garments, MOQs can sometimes start around 50 to 100 pieces per design, especially for heat transfer, DTF, or simple one-location prints. For custom cut-and-sew garments, common MOQs may range from 300 to 1,000 pieces per style or color, depending on fabric and trim sourcing. More technical garments, custom-dyed fabrics, or engineered sublimation programs may require higher quantities.
For sleeve print size grading, the practical MOQ may be affected by how many print versions are needed. A one-size sleeve logo can be easier to manage at low volume. A fully graded sleeve print across eight garment sizes may require higher order volume to justify setup and quality control.
Order Type Typical MOQ Range Notes for Sleeve Print Grading Decorated stock garments About 50-100+ pieces per design Best for simple sleeve logos or transfer prints Custom cut-and-sew tops About 300-1,000+ pieces per style/color Allows better control of sleeve pattern and placement Engineered sublimation About 100-500+ pieces depending on supplier setup Artwork may need size-specific panel grading Retail private-label programs Often 500-1,500+ pieces per style/color More sampling and inspection control recommendedA simple sleeve print on available blank garments may be produced in a shorter window, often a few weeks after artwork and sample approval. Custom cut-and-sew production usually takes longer because fabric, trims, patterns, grading, sampling, cutting, sewing, decoration, finishing, and inspection all need scheduling.
Lead times can be affected by:
Purchasing judgment: the buyer should not compress sample review to save a few days if the sleeve print is prominent. A poorly placed sleeve graphic is hard to correct after bulk printing. Reprinting may not be possible, especially on finished garments.
Sleeve print inspection should be specific. General apparel inspection may check workmanship, measurements, and packing, but it may miss placement problems unless the inspection checklist includes print map criteria.
Some variation is normal in garment decoration. A realistic tolerance may be around 5 to 10 mm for many sleeve placements, depending on method and garment construction. More complex sleeves, heavy fabrics, and finished garment printing may require wider tolerance. Premium programs may require tighter control, but that must be agreed before production.
The tolerance should state both vertical and horizontal placement allowances. A print can be correct from the cuff but too far toward the seam.
Scale errors occur when the wrong print size is applied to a garment size group. For example, a 3XL sleeve may receive the small-size transfer. This risk increases when multiple print sizes are prepared.
Factories should separate transfer sizes, label screens or files clearly, and check the first pieces for each size. Buyers should ask for size-set production photos when the risk is high.
Sleeves are curved, so alignment issues can look worse when worn. A logo that appears straight when flat may twist on the body if the sleeve seam reference was wrong.
Inspection should include flat garment review and, when practical, a mannequin or fit review for high-visibility orders.
Sleeve prints on dark garments need enough opacity. White underbase, ink deposit, transfer film type, and curing all affect the result. On polyester, dye migration can change print color, especially with reds, navies, and bright shades.
Buyers should confirm whether anti-migration inks or barriers are needed for polyester or sublimated base garments.
Wash durability depends on print chemistry, curing, transfer application, fabric surface, and laundering conditions. Common issues include cracking, peeling, fading, dye migration, and edge lifting.
For distributor orders where the end customer may reorder, durability standards should be clear. A wash test before bulk production is useful for large or brand-sensitive orders.
When sleeve prints are graded by size group, packing errors can be harder to detect visually. Units may look similar but use different print sizes. Carton labels, polybag labels, and final random inspection should verify that garment size, print size, and packing ratio match the purchase order.
A sleeve print size grading review should be systematic. The following checklist helps distributor buyers catch the main issues before bulk approval.
For most distributor buyers, grouped sleeve print grading is the best commercial option. It gives better appearance than one fixed print size and avoids the production burden of individual grading for every size. A common structure is to group smaller sizes, core sizes, and extended sizes, then check physical samples at least from the core and largest group.
For small bicep logos, one print size is usually acceptable unless the order includes a very wide size range. For full forearm wordmarks, grouped grading should be considered. For sublimated or engineered sleeves, size-specific artwork is usually the safer path.
The buyer should push for clarity before price negotiation is finalized. A supplier may quote a low sleeve print price based on one artwork size and one setup. If the buyer later requests four graded print sizes, the cost and timeline may change. This is not necessarily a supplier problem; it is a specification problem.
For buyers planning a new custom decorated apparel order, early technical discussion is usually worthwhile. Sourcing teams can share order details, artwork, target MOQ, and delivery requirements through the Fabrikn contact page.
Custom sleeve print map size grading is a practical control tool for distributor buyers. It reduces placement disputes, improves size-run consistency, and helps the factory understand exactly what should happen in production.
The key is to review the sleeve as a shaped, graded garment part rather than a flat decoration area. Sleeve length, taper, seam position, cuff construction, fabric stretch, and print method all affect the final result. Buyers who approve only a digital mockup are accepting unnecessary risk.
A strong sleeve print map should define artwork size, placement references, orientation, grading approach, production method, tolerances, and inspection points. Once those details are clear, sleeve decoration becomes much easier to price, sample, produce, and inspect.
Get a free quote from Fabrikn — your trusted B2B clothing manufacturer with 10+ years of experience. MOQ as low as 200 pieces.
Get a Free Quote →A custom sleeve print map is a measured production guide showing where sleeve artwork should be placed. It usually includes artwork dimensions, distance from cuff or shoulder seam, distance from sleeve seam, orientation, size grading, print method, and tolerance notes.
No. Small upper-sleeve logos often use one print size across all garment sizes. Long forearm prints, full sleeve graphics, youth-to-adult size runs, and retail-quality programs usually benefit from grouped or individual size grading.
Grouped grading is often the most practical choice. It improves visual consistency without creating a separate print setup for every garment size. One print size may be enough for simple promo orders, while engineered graphics may need individual size grading.
Important measurements include print width and height, distance from cuff, distance from shoulder or armhole seam, distance from sleeve seam, artwork orientation, rotation reference, and size-specific adjustments.
Many production orders use a placement tolerance around 5 to 10 mm, depending on fabric, garment construction, and print method. The tolerance should be agreed before bulk production and included in the inspection checklist.
Sometimes, but it should not be assumed. Youth sleeves are shorter and narrower, so an adult sleeve print may look too large or sit too close to the cuff. Separate youth placement review is recommended.
Screen printing works well for bold designs and larger runs. Heat transfer and DTF are useful for smaller runs or multi-color artwork. Sublimation is best for polyester performance garments and full-sleeve engineered graphics. The right method depends on fabric, quantity, artwork, durability needs, and budget.
The main risks are incorrect placement, wrong print size applied to a garment size, rotation around the sleeve, poor opacity, cracking, peeling, dye migration, and packing mix-ups when multiple graded print sizes are used.
Lower MOQs usually favor one print size or simple transfer decoration. Higher quantities can better support grouped grading, custom screens, engineered artwork, and more detailed sampling. Complex grading may raise setup cost and production control requirements.
The sleeve print map should be approved before bulk production and ideally before final pricing is locked. Any change to artwork, fabric, sleeve pattern, print method, or size range should trigger another review.