A 2500-word SEO outline for distributor buyers on using custom sleeve print maps to control placement, sizing, artwork, decoration tolerances, approvals,...
Sleeve Print Maps Checklist for Buyer QC - Decoration & Printing manufacturing guide
Category: Decoration & Printing
For distributor buyers, sleeve printing is a small surface area with a high complaint risk. A crooked logo on the chest may be noticed, but a sleeve print that rotates toward the underarm, runs into the cuff seam, or changes position across sizes can quickly become a reorder problem. The solution is not only better printing. It starts with a clear sleeve print map and a disciplined quality control checklist before bulk production begins.
A custom sleeve print map quality control checklist gives the buyer, decorator, and garment factory one shared reference. It defines where the artwork sits, how it scales, how it aligns to seams, what tolerance is acceptable, and what must be checked at sample, pre-production, inline, and final inspection stages. This is especially important for distributor orders where the end customer may approve a mockup visually, while the manufacturer needs production-ready measurements.
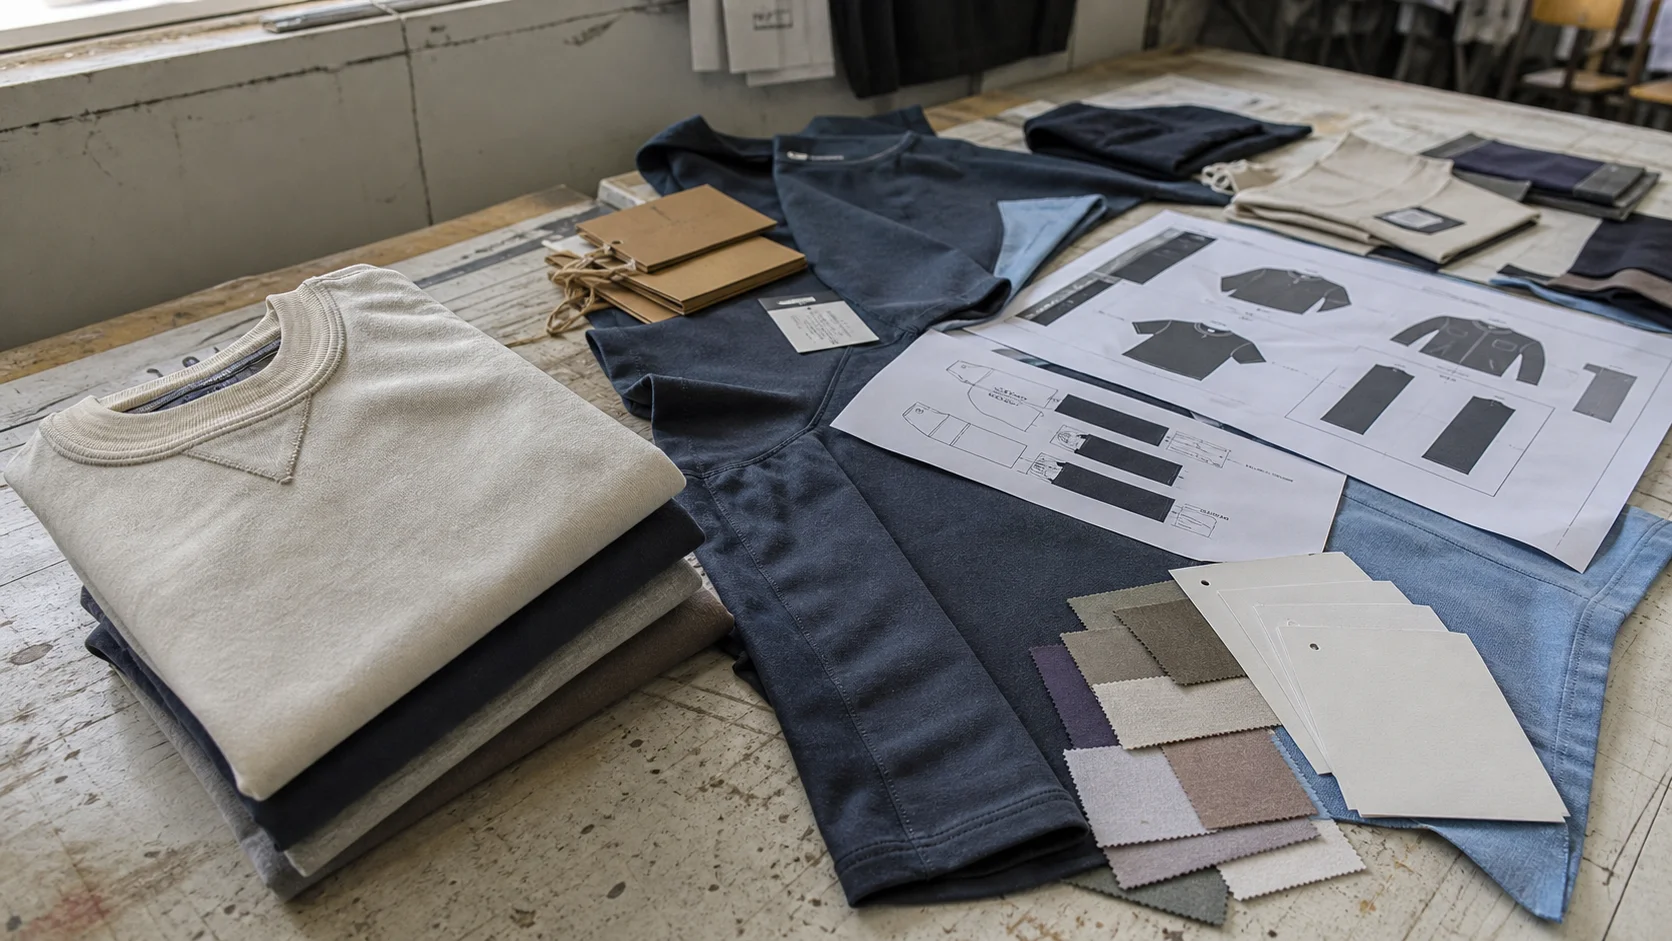
A sleeve print map is a technical placement guide for decoration applied to a garment sleeve. It is more precise than a sales mockup. A mockup shows the idea. A print map tells production how to repeat that idea consistently across units and sizes.
A useful sleeve print map normally includes the sleeve side, print orientation, artwork size, distance from shoulder seam or cuff, distance from sleeve fold or center line, and acceptable tolerance. For long-sleeve garments, the map may also define whether the artwork reads from shoulder to cuff or cuff to shoulder. For short sleeves, it may define whether the design is centered on the outer sleeve panel or placed closer to the front body.
Distributor buyers should treat the sleeve print map as a purchase control document. It belongs with the tech pack, purchase order, approved artwork file, and pre-production sample comments. If the factory or decorator receives only a PNG pasted onto a flat mockup, placement interpretation becomes a production risk.
A sleeve print map should answer one practical question: if a different operator sets up the job tomorrow, can they place the print in the same position without asking for clarification?
Sleeve prints create more placement variables than many buyers expect. Sleeves are curved, narrow, tapered, and often sewn with seams that do not sit perfectly flat during decoration. A sleeve print may be applied before sewing, after sewing, or on a finished garment using a platen. Each method carries different risks.
For distributor buyers, the complaint usually arrives after the goods are decorated, packed, and delivered to the end customer. Rework is expensive because replacement blanks, new printing time, repacking, and shipping all come into play. If the product is for an event, campaign, school program, or corporate launch, there may be no practical recovery window.
Sleeve print QC matters most when the order has one or more of these conditions:
A good QC process does not remove every variation. Apparel production always has tolerance. It does reduce subjective judgment, especially around what is considered centered, straight, acceptable, or rejectable.
The buyer should collect decoration requirements before asking the supplier to create a sleeve print map. Missing inputs lead to assumptions, and assumptions are hard to control in bulk production.
The supplier needs to know the exact garment style. A set-in sleeve, raglan sleeve, drop shoulder, compression sleeve, hoodie sleeve, and woven jacket sleeve all handle print placement differently. Placement measured from a shoulder seam may be simple on a set-in sleeve but less useful on a raglan because the seam angle changes the visual balance.
Buyers should confirm whether the sleeve has a side seam, underarm seam, cuff rib, placket, thumbhole, stripe, reflective tape, or panel join. These details affect usable decoration area and may restrict heat press or screen access.
Size range is critical. A sleeve print that looks balanced on adult large may look too long on youth small or too small on 3XL. Buyers should avoid approving placement from only one size if the order includes a wide range.
For mixed-size programs, ask the supplier whether the artwork will remain one fixed size across all garments or scale by size group. Fixed artwork is easier and cheaper to control. Size-graded artwork looks more proportional but adds setup complexity and higher QC burden.
The sleeve print map should identify the decoration method. Screen print, heat transfer, DTF transfer, sublimation, embroidery, silicone print, reflective transfer, and woven patch application all require different margins and tolerances.
Screen printing is efficient for larger runs but sleeve registration can be difficult if the garment is already sewn. Heat transfers can deliver clean details at lower MOQs, but pressure, temperature, peel method, and fabric compatibility must be controlled. Sublimation works best on suitable polyester fabrics and is not interchangeable with standard plastisol or water-based print expectations.
Artwork direction must be stated clearly. Common options include:
Do not rely on phrases like “print down the sleeve” or “center on sleeve.” Those instructions are too loose for production. They need measurements and a visual reference.
A sleeve print for corporate uniforms has different priorities from a promotional giveaway. Uniform programs need repeatability across reorders. Event merchandise may prioritize speed and cost. Athletic or outdoor products may need stretch recovery, wash durability, or reflective performance. The print map should reflect the commercial purpose of the order.
For buyers building a broader decoration program, reviewing supplier capabilities under fabrikn.com/services/ can help frame which print methods and garment types need tighter control.
Placement is the heart of sleeve print map QC. The buyer should approve exact measurement points, not just a rendered image.
State whether the print is on the wearer’s left sleeve, wearer’s right sleeve, or both sleeves. “Left sleeve” should always mean the wearer’s left unless the document states otherwise. Many disputes start because one party views the garment flat from the front while another references the wearer’s perspective.
Every sleeve print needs a stable reference point. Common reference points include:
The best reference point depends on garment construction. For a long vertical logo on a hoodie sleeve, distance from cuff edge and alignment to sleeve center may be more stable than distance from shoulder seam. For a short-sleeve tee, distance from shoulder seam and sleeve hem may be enough.
The map should list artwork width and height in inches or centimeters. Include whether measurement refers to the total bounding box, visible ink area, transfer sheet, or embroidery area. This distinction matters because transfers often include carrier margins that are not part of the visible design.
For long sleeve text, buyers should verify the maximum print height against the shortest sleeve length in the size range. A 14-inch vertical print may fit adult large, but it can crowd the cuff on adult small or youth sizes.
For vertical sleeve prints, distance from cuff is often easier to control than distance from shoulder, especially on hoodies, sweatshirts, and performance tops. The buyer should specify whether the artwork starts a set distance above the cuff seam or ends a set distance below the shoulder seam.
Typical placement references might include “bottom of artwork 2 inches above cuff seam” or “top of artwork 3 inches below shoulder seam.” The right choice depends on how the logo should appear when worn. If the design should be visible near the wrist, use the cuff as the main reference. If it should sit near the upper arm, use the shoulder or sleeve cap.
Sleeve prints can look crooked even when the measurement from one edge is correct. The map should define the vertical axis of the print. For finished garments, the print may be aligned with the sleeve fold, the outer sleeve center line, or the arm’s natural hang line.
Rotation tolerance is important for long text. A small angle error becomes obvious across a 12-inch print. Many buyers use a practical visual tolerance such as no obvious tilt when garment is laid flat and measured against the approved center line. For higher-spec orders, define a numeric tolerance, such as within 3 degrees of approved axis, if the inspection team can measure it consistently.
Keep artwork away from bulky seams, cuffs, and underarm areas unless the design intentionally interacts with those features. Edge clearance reduces print distortion, peeling, skipped ink, and heat press marks.
As a practical buying rule, allow extra margin on rib cuffs, curved sleeve seams, and heavy fleece. Tight placement may look good on a digital mockup but fail on a platen. If the client insists on a near-cuff or near-seam placement, record the risk and approve a physical sample before bulk.
Artwork problems often appear as production problems. The buyer should require print-ready files and version control before sampling.
Vector artwork is preferred for most logos, line art, and text. Common acceptable formats include AI, EPS, PDF, or SVG, depending on the supplier’s workflow. Raster artwork may be acceptable for photographic or full-color transfer work, but resolution must be high enough at final print size.
Buyers should request confirmation of final artwork dimensions after the decorator opens the file. Scaling errors can happen when files move between design platforms.
Color should be specified using Pantone, CMYK, RGB, or supplier ink standards depending on the method. Pantone references are common for screen print and brand control, but exact matching depends on ink type, fabric color, opacity, curing, and underbase.
For dark garments, ask whether the print requires a white underbase. Underbase can improve opacity but may make the print feel heavier. On stretch fabrics, too much ink deposit can crack or reduce stretch recovery.
Sleeve prints often use vertical text, small marks, or narrow logos. Confirm minimum line thickness and minimum letter height for the chosen method. Fine details that work in digital mockups may fill in during screen printing or lose clarity after heat transfer application.
For practical distributor orders, small legal copy, fine gradients, and thin outlines should be reviewed early. If the sleeve print must remain readable from a normal viewing distance, the supplier should produce a strike-off or decoration sample.
Artwork orientation errors are common on sleeve jobs. The file should include a labeled mockup showing wearer’s left and wearer’s right. If both sleeves are printed, each sleeve should have its own placement map unless they are truly mirrored with identical specifications.
Never assume the left sleeve file can be reused on the right sleeve without checking logo direction and reading orientation. Brand marks may need to face forward, outward, or toward the body depending on customer preference.
The garment affects print quality as much as the decorator does. A buyer’s QC checklist should include fabric and trim details that influence placement, adhesion, opacity, hand feel, and durability.
Cotton, cotton-poly fleece, polyester jersey, nylon, spandex blends, rib knit, and coated outerwear fabrics each behave differently. Cotton usually accepts screen print well but may shrink during washing. Polyester can migrate dye into light inks if not controlled. Nylon often needs special inks or adhesives. Spandex blends require stretch-compatible decoration.
The print method should be matched to the fabric. A standard plastisol print may not be the right choice for a high-stretch compression sleeve. A heat transfer that works on cotton tees may fail on water-repellent nylon. Ask for fabric compatibility confirmation before sample approval.
Heavy fleece can create uneven pressure during sleeve printing, especially near seams and cuffs. Ribbed sleeves distort artwork because the print sits across raised and recessed surfaces. Lightweight performance jersey can scorch or shine if heat press settings are wrong.
Buyers should ask whether the sample fabric is identical to bulk fabric. A sleeve print approved on a substitute blank may not represent final bulk behavior.
If the sleeve print is applied before garment wash or after dyeing, shrinkage can shift the final look. This is important for garment-dyed sweatshirts, washed tees, and any product with post-decoration processing.
The print map should specify whether placement is measured before wash or after wash if washing is part of production. Final inspection should use the same measurement condition stated in the approved documents.
Trims can block decoration equipment. Thumbholes, zippers, snaps, elastic cuffs, reflective tape, sleeve pockets, and seam tape may prevent flat loading onto a sleeve platen. These details should be checked during sample planning, not discovered during bulk setup.
If the garment has complex sleeve construction, ask the supplier to confirm the maximum print area. A technically possible print may still be too slow or inconsistent for the target price.
Sample approval is where the print map becomes real. Distributor buyers should separate artwork approval from production sample approval. A customer saying “logo looks good” on a PDF is not the same as approving placement on an actual sleeve.
The digital proof should show the garment style, sleeve side, artwork size, placement measurements, colors, and orientation. It should include a front or back view if that helps explain the sleeve relationship to the body.
Buyers should check spelling, logo version, sleeve side, print direction, and size range notes. This is the lowest-cost stage to correct errors.
A strike-off is a decoration test on fabric or similar material. It helps confirm color, ink deposit, detail, opacity, hand feel, stretch, and curing. It may not confirm final placement unless applied to an actual garment sleeve.
Strike-offs are useful when the artwork has fine detail, brand colors, specialty inks, reflective transfers, puff effects, silicone, or technical fabric. They are also useful when the buyer has not used the supplier’s decoration process before.
The pre-production sample should be made on the correct garment or a production-equivalent garment. It should follow the approved print map. The buyer should measure it, photograph it, comment on it, and approve it in writing before bulk production.
For orders with wide size ranges, one sample size may not be enough. Consider requiring placement confirmation on the smallest and largest size if the sleeve artwork is long or close to edges.
Approval comments must be specific. “Approved with changes” is risky unless the changes are listed and acknowledged by the supplier. Better comments include exact updates, such as “move artwork 0.5 inch higher from cuff” or “reduce height from 12 inches to 10.5 inches for youth sizes.”
The final approved map should carry the same revision number as the approved sample. If the artwork file changes after sample approval, the map should be rechecked.
For high-value or repeat orders, keep an approved physical sample or signed photo standard. A physical standard gives production and inspection teams a visual benchmark. Photos are useful but can mislead color and scale unless they include a ruler and clear measurement references.
Buyers who need help setting up sample review or order communication can use fabrikn.com/contact-us/ to start a project-specific discussion.
Sleeve print QC should not wait until final inspection. The best control points are before bulk decoration, during the first production pieces, during the run, and before packing.
Before bulk printing starts, the production team should confirm the garment style, size breakdown, approved artwork, print map revision, ink or transfer batch, machine settings, and sample standard. Any mismatch should stop the job until clarified.
The buyer should ask for first-piece photos with a ruler when the order value or complaint risk is high. Photos should show the full sleeve, close-up of artwork, cuff or shoulder reference, and orientation on the garment.
The first article is the first correctly produced piece from the bulk setup. It should be measured against the print map. The approval should record placement, color, print clarity, adhesion or cure, and sleeve side.
For distributor orders with tight delivery dates, first article approval needs a quick response path. Delayed approval can push the shipment. Rushed approval can lock in a costly error.
Inline inspection catches drift during production. Sleeve prints can shift as operators load garments differently, platens heat up, transfers are peeled inconsistently, or screens lose tension. A good inline check samples pieces from different operators, sizes, and production times.
Inline QC should check:
Final inspection should verify both decoration and general garment condition. Printing can introduce stains, handling marks, heat press impressions, or packaging mix-ups. Final QC should sample by size and color, not only from the top cartons.
For custom sleeve decoration, final inspection is usually too late to fix systemic placement errors economically. It is still essential because it controls shipment quality and documents whether the order meets the approved tolerance.
Tolerance is where buyer judgment matters. A zero-tolerance expectation may sound safe, but it is rarely realistic in garment decoration. The right approach is to define commercially acceptable variation before production.
Placement tolerances vary by product type, print method, and customer expectation. For many commercial apparel orders, a tolerance around plus or minus 0.25 inch to 0.5 inch is commonly discussed for placement, assuming the garment itself is within tolerance. Long sleeve vertical artwork may need tighter rotation control because tilt is more visible than small vertical movement.
Buyers should not copy a generic tolerance into every order. A small sleeve icon on a promotional tee may tolerate more variation than a premium uniform sleeve logo. A design printed near the cuff should have tighter edge clearance control than a large centered graphic.
Classify defects before inspection. Wrong sleeve, upside-down artwork, severe peeling, or incorrect logo version should usually be critical or major defects. Slight placement variation within tolerance may be acceptable. Minor ink specks may be accepted or rejected depending on brand positioning and garment color.
For distributor buyers, the end customer’s standard matters. A luxury retail program, corporate uniform rollout, and local event giveaway should not use the same acceptance logic.
Inspection teams need a consistent measurement method. The garment should be laid flat without excessive stretching. The sleeve should be smoothed naturally. Measurements should follow the approved reference points. If the sleeve is tapered or curved, the inspector should avoid forcing it into an unnatural flat shape that changes the print position.
Photos used for dispute resolution should include a ruler and show the complete reference area. Close-ups without context rarely settle placement questions.
Sleeve print orders are affected by MOQ, decoration method, artwork complexity, garment availability, and approval speed. Buyers should align commercial expectations with production realities before quoting the end customer.
MOQ depends on supplier, garment type, and print method. As a cautious planning guide:
Lower MOQ gives flexibility but usually increases unit cost. Higher MOQ improves setup efficiency but raises inventory and approval risk. If the sleeve print placement is difficult, buyers should spend more effort on sampling before committing to volume.
Lead time is not only printing time. It depends on blank garment availability, fabric sourcing, artwork readiness, sample rounds, client approval speed, print method, production queue, curing or drying time, quality inspection, packing, and shipping mode.
Typical decorated blank programs may move faster than custom cut-and-sew production. A simple heat transfer on stocked garments can sometimes be planned in days to a few weeks, while a custom garment with sleeve decoration can take several weeks or longer. Exact timing should be confirmed per order because season, capacity, and material availability change quickly.
Buyers should judge sleeve print cost against risk. A cheaper method may be acceptable for short-term promotional wear but unsuitable for performance uniforms that face repeated washing. A larger print may create stronger visual impact but increase ink cost, hand feel, and defect visibility. Size-graded artwork may look better across sizes but increases setup and inspection complexity.
Direct purchasing judgment: if the order is low volume, time-sensitive, and artwork is simple, a quality transfer may be the practical route. If the order is high volume with one or two solid colors, screen printing may offer better unit economics. If the garment is technical or stretch-heavy, method compatibility should outweigh the lowest quote.
A practical sleeve print map does not need to be complicated, but it must be complete. Buyers can structure it as a one-page document attached to the purchase order. It should include the garment code, color, size range, artwork code, decoration method, sleeve side, artwork dimensions, measurement references, tolerance, and approval status.
For example, a long-sleeve logo might be specified as follows: wearer’s right sleeve, text reads from shoulder to cuff, artwork height 11 inches, artwork width 1.75 inches, bottom of artwork 2.5 inches above cuff seam on adult medium sample, centered on outer sleeve panel, placement tolerance plus or minus 0.25 inch, rotation no obvious tilt against sleeve center line. This type of instruction gives production something measurable.
For size ranges, add whether placement is fixed or graded. Fixed placement means the same artwork size and reference distance are used across sizes. Graded placement may use smaller artwork for youth or smaller adult sizes. The buyer should ask the supplier to provide a size grading table if different measurements apply.
This document should travel with the order. If the supplier updates it, the buyer should confirm the revision. Version control is not paperwork for its own sake; it prevents bulk production from following an old mockup.
Size grading is one of the more difficult decisions in sleeve decoration. Many buyers prefer one print size across all adult sizes because it simplifies setup and pricing. That approach can work well when the artwork is modest in size and not close to the cuff or shoulder.
Problems appear when the artwork is long, when youth and adult sizes share one design, or when the sleeve length changes significantly. A vertical print that fills the adult medium sleeve may overpower youth sizes. A small print scaled for youth may look weak on 3XL.
Buyers have three common options:
The first option is usually a reasonable balance for distributor programs that include youth and adult sizes. The second option gives better proportion but increases setup checks. The third option keeps artwork consistent but may shift visual balance from size to size.
Direct purchasing judgment: avoid excessive grading unless the design truly needs it. Every additional artwork size creates another chance for cartons, transfers, screens, or files to be mixed.
Screen print is a strong option for volume orders with solid-color artwork. It can provide durable results and competitive unit costs after setup. Sleeve printing with screens can be less forgiving than flat chest printing because loading and alignment are harder.
Buyers should check ink type, underbase, cure temperature, sleeve platen suitability, and whether the print can be held straight across all sizes. Fine details, long vertical prints, and multi-color registration require extra review.
Heat transfers and DTF transfers are useful for lower MOQs, full-color graphics, and fast-turn programs. They can also simplify repeat placement if the transfer sheet is cut and aligned properly. Quality depends on transfer material, press settings, fabric compatibility, peel method, and post-press handling.
Inspection should check edge lifting, adhesive residue, cracking after stretch, hand feel, and press marks. Heat-sensitive fabrics need particular caution.
Sublimation is suitable for compatible polyester fabrics and can be excellent for allover or panel-based graphics. It is not a general replacement for printing on cotton. Color shifts, white base requirements, and fabric composition must be understood before quoting.
If sleeve graphics are sublimated before sewing, placement must account for cutting and sewing tolerance. If the sleeve panel shifts during sewing, the print may not align exactly as expected on the finished garment.
Embroidery on sleeves is possible but may be limited by hoop access, sleeve width, and garment construction. Small sleeve embroidery can look premium, but puckering, backing irritation, and placement variation should be reviewed. Patches require attention to edge finish, adhesive or stitch method, and sleeve curvature.
For complex decoration programs, buyers can review company background and sourcing approach through fabrikn.com/about-us/ before deciding how much development support is needed.
Final QC should follow a written inspection plan. The inspection level depends on order quantity, customer requirements, and risk. Many apparel buyers use AQL-based sampling, but decoration-sensitive orders may need added checks for first cartons, last cartons, and every size or colorway.
Inspectors should first confirm the assortment: style, color, size, quantity, and sleeve print version. Then they should measure placement on selected units. After placement, they should assess print quality, garment condition, packing, labeling, and carton marks.
When a defect is found, the inspector should determine whether it is isolated or systemic. One slightly tilted print may be a minor or major defect depending on tolerance. A full batch with the same wrong sleeve placement indicates a setup error and should trigger containment.
Do not let final inspection become a simple photo review. Photos help, but sleeve placement must be measured. If the supplier sends only attractive folded images, important placement errors can be hidden.
Some sleeve print requests should trigger extra caution before the purchase order is issued. A buyer does not need to reject them automatically, but the quote should include sampling, tolerance, and timing safeguards.
These risks can be managed, but they should be priced and scheduled honestly. The lowest quote is not always the best buy if it removes the sampling step that prevents a bulk rejection.
Distributor buyers should maintain a simple order file for each custom sleeve print job. This file protects the buyer during disputes and supports reorders.
For reorders, confirm that the same garment style, fabric, supplier, artwork file, and placement map are still valid. A small garment style update can change sleeve length, seam position, or cuff construction. Reorder does not automatically mean repeatable unless the inputs are unchanged.
Sleeve print quality control is not about making the process complicated. It is about removing avoidable ambiguity. Distributor buyers should insist on a measured sleeve print map, clear artwork files, fabric compatibility checks, sample approval, and inspection criteria before bulk production.
The most important buyer decision is to match the print method, placement tolerance, and sample process to the order risk. Low-risk promotional orders may only need a clear proof and careful final check. Higher-risk uniform, retail, or technical apparel programs need physical samples, first article approval, and tighter inspection.
A good sleeve print map protects both sides. The buyer gets a repeatable standard. The supplier gets clear production instructions. The end customer receives garments that match the approved expectation, not just a digital mockup.
Get a free quote from Fabrikn — your trusted B2B clothing manufacturer with 10+ years of experience. MOQ as low as 200 pieces.
Get a Free Quote →A sleeve print map is a technical placement guide that shows exactly where artwork should be printed on a garment sleeve. It usually includes sleeve side, artwork size, distance from cuff or shoulder, alignment reference, orientation, and tolerance.
Many commercial orders discuss placement tolerance around plus or minus 0.25 inch to 0.5 inch, but the right tolerance depends on artwork size, garment type, decoration method, and customer expectations. Long vertical sleeve prints often need tighter rotation control.
One fixed artwork size is simpler and cheaper to manage. Size-graded artwork can look more proportional across youth and adult sizes but adds setup complexity and inspection risk. For mixed youth and adult programs, separate youth and adult artwork sizes are often a practical compromise.
The biggest risks are wrong sleeve side, reversed orientation, crooked placement, poor fabric compatibility, and inconsistent positioning across sizes. These risks are best controlled with a measured print map and approved pre-production sample.
A digital mockup is useful for early approval, but it is not always enough for production. A physical sample or first article approval is recommended when the artwork is large, close to seams, applied to technical fabric, or part of a high-value order.
There is no single best method. Screen print works well for many volume orders with simple colors. Heat transfer and DTF can suit lower MOQs and full-color graphics. Sublimation works for compatible polyester fabrics. The best choice depends on fabric, quantity, artwork, budget, and durability needs.
Buyers should check sleeve side, artwork direction, size, distance from cuff or shoulder, centering, rotation, color, opacity, detail clarity, hand feel, adhesion or cure, and compatibility with the garment fabric. Approval comments should be written and tied to the final artwork revision.
Use a measured sleeve print map, confirm artwork files, approve a physical or first article sample when risk is high, define tolerances, inspect during production, and keep clear records for reorders. Clear documentation is the most reliable way to prevent subjective placement disputes.