A SEO-focused outline for repair chain buyers evaluating sleeve print maps, seam placement, and seam strength risks before approving decorated uniform...
Sleeve Print Maps for Repair Chain Buyer Reviews - Fabrikn production reference
Repair chain buyers do not review decorated apparel the same way a lifestyle brand reviews a seasonal capsule. The buying decision is usually tied to store rollout consistency, technician uniform durability, reorder control, and complaint prevention. A sleeve print map is one of the documents that keeps those priorities aligned before bulk production starts.
For repair chains, sleeve decoration often carries service identity: roadside support, appliance repair, phone repair, automotive service, HVAC, equipment rental, or field maintenance. The sleeve may hold a logo, service category, QR code, safety mark, branch identifier, or campaign message. That artwork has to survive repeated washing, arm movement, abrasion against work surfaces, and pressure from tool belts, jackets, and vehicle interiors.
This article explains how repair chain buyers should review sleeve print maps, especially where print placement meets seam strength. It covers artwork mapping, construction risks, fabric and trim specifications, sample approval steps, typical MOQ ranges, lead-time dependencies, inspection points, and practical tradeoffs when comparing printing methods.
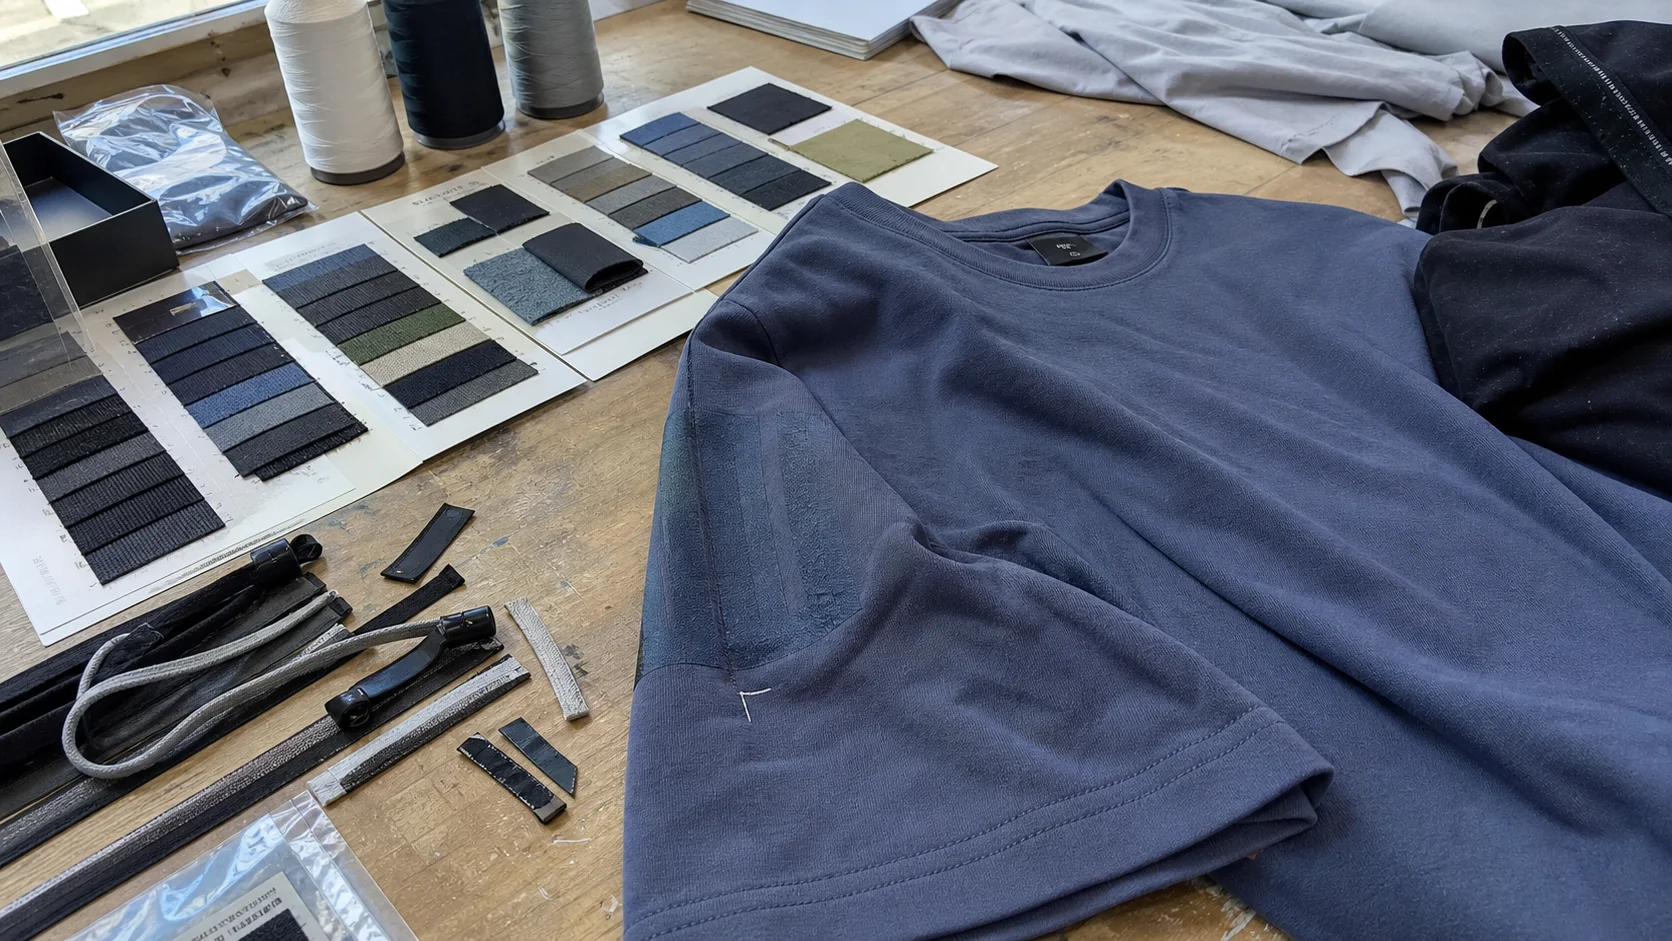
A sleeve print map is a production guide showing exactly where sleeve decoration should sit on a garment. It normally includes artwork size, print direction, distance from sleeve hem, distance from shoulder seam, distance from underarm seam, left or right sleeve location, print color references, and tolerance limits. For repair chain uniforms, the map should also note whether the garment will be worn tucked, layered under jackets, or used in high-movement field work.
A useful sleeve print map is not just a drawing. It is a buyer review document, a sampling guide, and an inspection reference. It reduces arguments later because everyone can compare the finished sleeve against an approved standard.
The map should be tied to the garment spec sheet. Sleeve width, sleeve length, cuff type, shoulder construction, fabric stretch, and seam allowance all affect how a print reads when the technician is wearing the shirt. A 90 mm logo may look balanced on a men’s large long sleeve shirt but oversized on a women’s small short sleeve polo. Grading rules matter.
Buying judgment: if a supplier only sends an artwork file and says “standard sleeve position,” the buyer should ask for a print map before approving bulk. “Standard” is not a production specification.
Repair chain buyers should treat the sleeve print map as part of the quality file. It should sit beside the purchase order, approved lab dip or color standard, size spec, trim card, wash care label artwork, and packing instruction.
Repair chains buy uniforms for many users, not one photo shoot. A field technician may receive five shirts and wear them weekly. A franchise branch may reorder six months later and expect the same look. A central purchasing team may compare suppliers across different production lots. Sleeve print maps help control those outcomes.
The main reason is repeatability. Sleeve decoration can drift because operators load sleeves differently, garment sizes change, cuffs twist, and tubular or side-seamed bodies behave differently under a platen. Without a defined map, a logo can sit too close to the elbow, rotate toward the underarm, or disappear under a jacket sleeve.
The second reason is seam protection. A sleeve print placed directly over a bulky seam, coverstitch, cuff join, or underarm intersection can crack, peel, distort, or interfere with seam stretch. This is a bigger issue for repair chain apparel than for casual promotional shirts because technicians bend, lift, crawl, reach, and wash garments frequently.
The third reason is brand control. Repair chains often operate across branches, vans, workshops, counters, and customer homes. The uniform needs to look organized. A crooked sleeve mark suggests careless production even when the garment itself is serviceable.
Buyers managing multi-location programs can also use sleeve print maps when requesting quotes from multiple suppliers. That keeps quotes comparable. For broader production support, buyers can review garment development and decoration options through Fabrikn services before locking a uniform program.
Sleeve print placement should never be reviewed separately from seam strength. The print itself may not weaken the seam, but poor placement can increase stress, reduce stretch recovery, or create an early failure point near the seam. Buyers should review both the decoration zone and the construction method.
Common sleeve seams include overlock seams, coverstitch seams, flatlock seams, single-needle seams, and cuff attachment seams. Each has different bulk and stretch behavior. A print passing over a raised seam can lose ink coverage at the ridge. A heat transfer crossing a seam may not bond evenly because heat and pressure are uneven. Embroidery too close to a seam can stiffen the area and create puckering.
For repair chain buyers, seam strength review should include visual assessment and basic physical checks. The supplier should confirm stitch type, stitch density, thread type, seam allowance, and whether the garment is designed for repeated industrial or home laundering. If the sleeve is a knit polo or T-shirt, stretch at the sleeve seam matters. If it is a woven work shirt, seam slippage and thread breakage are bigger risks.
Review Point Why It Matters Buyer Action Print distance from seam Reduces cracking, peeling, and distortion near seam bulk Set a minimum clearance, often 10-20 mm depending on print method Underarm seam alignment Controls logo rotation when the sleeve is worn Mark print angle relative to underarm or shoulder seam Cuff seam proximity Prevents heat press pressure loss and print edge lifting Avoid placing transfer edges directly on cuff join Stretch direction Protects ink film and seam recovery during movement Use stretch-compatible ink or transfer on knit sleeves Stitch integrity after decoration Heat, pressure, and handling can expose weak sewing Inspect decorated samples after wash and stretch checksA practical clearance rule is helpful, but it should not be treated as universal. Screen printing may tolerate closer placement than thick transfer film if the print is flat and the seam is low profile. Embroidery usually needs more room to avoid puckering. Reflective heat transfers need controlled pressure and clean edges. Buyers should ask the factory to explain the minimum safe clearance based on the actual sleeve construction.
Seam strength should also be reviewed after decoration, not only before. Heat pressing can flatten seams, expose skipped stitches, or create shine marks on polyester blends. Heavy embroidery can create needle damage on lightweight knits. Silicone or high-density prints can stiffen the sleeve and change how the seam feels during movement.
A clear sleeve print map divides the sleeve into workable zones. Each zone has different risks.
The upper outer sleeve is the most common location for repair chain logos or service identifiers. It is visible when staff stand with arms relaxed and is less likely to rub against counters than the forearm. The main risk is rotation. If the map does not define the reference seam, the logo may face too far forward or backward.
For short sleeve polos and tees, buyers often specify placement by distance from sleeve hem and centered between sleeve fold and seam. Typical sleeve logo sizes may range from 60-100 mm wide for small marks, while larger sponsor or service graphics may run 100-160 mm depending on garment size. Exact size should be confirmed on the smallest and largest sizes in the range.
Lower sleeve printing is common for long sleeve workwear, base layers, and performance shirts. It offers strong visibility when arms are extended. It also faces higher abrasion. Technicians may rest forearms on vehicles, counters, appliances, or workbenches. Transfers and thick inks can wear faster in this zone.
For long sleeve garments, the map should show whether the artwork is read from shoulder to cuff or cuff to shoulder. This seems minor until bulk production arrives with half the sleeves printed in a direction the buyer did not expect.
Cuff-adjacent decoration is risky. Rib cuffs stretch. Woven cuffs have plackets and seam bulk. Heat transfers near cuffs may lift if the edge sits on an uneven surface. Screen print quality can drop if the cuff prevents the sleeve from lying flat.
Buyers should use cuff area decoration only when the artwork is small, the production method is tested, and the supplier has shown a sample after washing. It can look premium, but it is not the safest zone for high-volume repair uniforms.
Inner sleeve printing is less visible and more prone to friction. It may be useful for internal marks, QR codes, or technical labeling, but buyers should question whether the added decoration cost is justified. Underarm areas also have sweat, seam intersections, and fabric movement. This is usually a poor location for large printed graphics.
A sleeve print map is only reliable when the fabric and trim specifications are controlled. The same artwork can behave differently on cotton jersey, polyester pique, cotton-rich fleece, nylon workwear, and stretch softshell. Repair chain buyers should require the decoration supplier to test on the actual production fabric, not a similar leftover.
Common repair uniform fabrics include 160-220 gsm cotton or cotton-poly jersey, 180-240 gsm pique polo fabric, 220-320 gsm fleece, 120-180 gsm woven shirting, and heavier workwear twills or canvas. Performance shirts may include polyester or recycled polyester with elastane. Each base has different heat tolerance, shrinkage, dye migration risk, and surface texture.
Trim can interfere with sleeve decoration as well. Reflective tape, sleeve pockets, pen holders, shoulder panels, rib cuffs, and plackets all restrict print area. The sleeve map should show these trims, not ignore them. If the garment has a sleeve pen pocket, the decoration may need to shift upward or move to the opposite sleeve.
Buyers should confirm thread and seam details when reviewing seam strength. Polyester thread is common for durability. Cotton thread may not perform as well in repeated wash and dry cycles. Stitch density should be balanced; too few stitches reduce strength, while too many can perforate lightweight fabric. For knit sleeves, seam stretch should match fabric stretch.
Color specifications also matter. Sleeve prints often use corporate brand colors. Pantone references are useful, but buyers should know that exact color matching varies by fabric color, print base, ink chemistry, curing, and lighting. A white underbase may be required on dark sleeves. That adds hand feel and may affect stretch.
There is no single best sleeve decoration method for every repair chain. The right choice depends on order size, garment fabric, artwork detail, durability target, hand feel, and reorder frequency.
Screen printing is usually cost-effective for medium to large runs with consistent artwork. It works well on many cotton and cotton-blend garments. For sleeve prints, it can produce a clean, durable result when the sleeve is loaded correctly and the ink is cured properly.
The tradeoff is setup. Each color requires screens, and small sleeve artwork still needs careful registration. MOQ expectations vary, but many suppliers prefer at least 100-300 pieces per artwork for efficient screen printing. Lower quantities may be possible with surcharges.
Buyers should watch for undercured ink, poor opacity on dark sleeves, print cracking after stretch, and inconsistent placement between sizes. A sleeve print map with defined tolerances helps prevent these problems, but curing and handling still need inspection.
Heat transfer is useful for smaller batches, names, branch IDs, reflective marks, and multi-color logos. It can be efficient when a repair chain needs multiple locations or staggered orders. Transfers can also hold fine detail better than some sleeve screen prints on textured fabrics.
The tradeoff is bonding risk. Poor pressure, incorrect temperature, short dwell time, seam interference, or unsuitable fabric finish can cause lifting. Polyester garments may scorch, shine, or migrate dye into the transfer. Buyers should require wash testing and edge-lift checks on actual fabric.
Typical MOQ can be flexible, sometimes from 20-50 pieces per design for local or short-run programs, though total cost per unit may be higher. For larger chain rollouts, transfer production may still require minimum sheet quantities or batch planning.
Embroidery can look durable and professional on polos, work shirts, jackets, and heavier garments. It is less common for large sleeve graphics but useful for compact marks. It avoids some ink cracking concerns and can suit premium service uniforms.
The tradeoff is weight and puckering. Lightweight sleeves may distort under dense stitching. Embroidery close to seams can create stiffness and discomfort. Buyers should review stitch count, backing type, thread color, and embroidery size before approving bulk.
Embroidery MOQs can be lower than screen print in some programs, often from 25-100 pieces, but digitizing charges and stitch count affect cost. It is not always the cheapest option for large multi-color sleeve marks.
Digital print can support complex artwork and lower quantities. It is less common for rugged repair chain sleeve programs unless the fabric and volume fit the method. Sleeve loading can also be slower and more variable than body printing.
The tradeoff is durability and production efficiency. Buyers should be cautious with dark polyester, high-wash uniforms, and sleeves that face abrasion. Samples need wash and rub review.
Some repair chains use reflective sleeve marks for roadside, utility, or night-response teams. Reflective transfer or print can improve visibility, but it carries stricter performance expectations. Placement should not be treated as decoration only; it may relate to safety policy or compliance needs.
Reflective materials often have wash limitations and bonding requirements. Buyers should confirm the applicable standard if visibility performance is part of the claim. A decorative reflective logo is not the same as certified high-visibility garment construction.
A disciplined sample approval process protects the buyer and the supplier. It should be simple enough to run on schedule but detailed enough to catch sleeve placement and seam risks before bulk production.
The buyer should provide vector artwork where possible, color references, target print size, sleeve side, garment style, size range, and intended use. The supplier should return a sleeve print map showing placement dimensions and tolerances.
At this stage, buyers should ask whether the artwork is suitable for the sleeve. Thin lines, tiny text, distressed textures, and wide horizontal graphics may not reproduce well on a curved sleeve. A supplier should flag these issues early.
The blank or pre-production garment should be checked before decoration. Review sleeve length, width, seam straightness, cuff shape, fabric shade, shrinkage expectations, and surface defects. If the sleeve is already twisting before printing, the final decoration will not look straight.
A strike-off shows the print method on the actual fabric or a production-equivalent panel. For sleeve maps, a full garment sample is better because placement depends on sleeve construction. The trial should include the smallest and one mid or large size if grading risk is high.
Buyers should review color, opacity, edge clarity, hand feel, placement, seam clearance, and stretch response. If the sleeve print crosses near a seam, reject or revise before bulk unless the test proves it is stable.
Formal lab testing is not always needed for every order, but repair chain uniforms should at least go through practical wash checks when budget and timeline allow. A common internal standard is 3-5 wash cycles for initial screening, with higher-cycle testing for long-term uniform programs. Wash method should reflect the user reality: home laundry, commercial laundry, tumble drying, or air drying.
After washing, inspect print cracking, edge lifting, color change, sleeve shrinkage, twisting, seam puckering, and thread breakage. A print that looks good before washing but fails after three cycles is not suitable for technician uniforms.
The approved pre-production sample should be signed off with photos, measurements, and comments. The approval should state whether bulk tolerance is measured from the sleeve hem, shoulder seam, sleeve fold, or underarm seam. Ambiguous approvals create disputes later.
Buyers preparing a new repair chain uniform program can use Fabrikn’s contact page to discuss print mapping, sampling, and supplier coordination before starting a full rollout.
MOQ and lead time depend on garment sourcing, decoration method, artwork count, color count, trims, packaging, and inspection requirements. Repair chains often need both initial rollout volume and ongoing replenishment. Those two needs may require different production planning.
Typical MOQ ranges vary by supplier and country, but buyers can use broad planning ranges:
Program Type Typical MOQ Range Best Fit Local heat transfer order 20-100 pieces per artwork Branch trials, name sets, small repair teams Screen printed uniform batch 100-300 pieces per artwork Regional rollout with repeated sleeve logo Custom cut-and-sew program 300-1000+ pieces per style/color Chain-wide uniform standardization Embroidery program 25-100 pieces per design in many cases Polos, jackets, premium service uniforms Reflective sleeve marking 50-300 pieces depending on material and setup Roadside, utility, and field safety teamsThese ranges are not guarantees. A supplier may accept lower quantities with surcharges, especially for repeat buyers or stock blanks. Custom dyed fabric, private-label trims, or special packaging can push MOQs higher. Buyers should separate garment MOQ from decoration MOQ. A blank garment supplier may have one minimum, while the print house has another.
Lead time can range from a few days for local decoration on stock blanks to several weeks for custom garment production. A practical planning range for decorated stock garments is often 1-3 weeks after approval, assuming artwork, blanks, and trims are ready. Custom cut-and-sew production may require 6-12 weeks or more depending on fabric sourcing, sampling rounds, capacity, and shipping method.
Several factors can extend lead time:
Buyers should build approval time into the schedule. A seven-day production quote is not realistic if the artwork still needs revision, the sleeve map is not approved, and no one has tested seam clearance. Rushing the map stage usually moves the delay into bulk correction, where it costs more.
Inspection for sleeve print maps should focus on measurable defects and use-related risks. Cosmetic review alone is not enough. A sleeve logo can look acceptable on a table but sit badly when worn.
Common inspection risks include placement variation, print rotation, poor opacity, ink cracking, transfer edge lift, seam puckering, skipped stitches, shade mismatch, heat press marks, fabric scorching, dye migration, and sleeve twisting. Buyers should define acceptable tolerances before production begins.
For sleeve placement, many buyers use a tolerance of about 5-10 mm for small marks, but the right tolerance depends on artwork size, garment size, and production method. A 10 mm shift on a tiny sleeve icon may look obvious. The same shift on a larger long sleeve graphic may be acceptable. Rotation tolerance should also be defined, especially for vertical forearm prints.
Inspection should compare bulk goods against the approved pre-production sample and print map. Inspectors should check multiple sizes because sleeve length and width change across the size range. They should also check both left and right sleeves if the program includes different artwork on each side.
Defect Likely Cause Inspection Method Logo too close to seam Incorrect loading or unclear map reference Measure clearance from seam edge Print rotated Sleeve not aligned on platen Compare angle to approved sample Transfer lifting Low pressure, seam bulk, wrong temperature, unsuitable fabric Visual edge check and light stretch check Cracking after stretch Ink film too rigid or undercured Stretch sleeve gently and inspect surface Seam puckering Embroidery density, heat distortion, poor sewing balance Lay sleeve flat and inspect seam line Color variation Ink batch, fabric shade, underbase difference Compare under controlled lightingBuyers should avoid vague inspection language such as “print must look good.” Better language is “right sleeve logo centered 75 mm above sleeve hem, tolerance 5 mm, top edge parallel to sleeve hem, no edge lift, no visible cracking after light manual stretch.” That gives the supplier and inspector a shared target.
For high-volume repair chain orders, inspection should include packed goods checks. Sleeve prints can be damaged by folding, stacking before full cure, or packing while transfers are still warm. Tissue, folding method, carton pressure, and humidity can affect the final appearance.
A good review checklist helps buyers catch issues early without slowing the order unnecessarily. It should be used before sample approval and again before bulk release.
Repair chain buyers should also decide how much variation is commercially acceptable. A premium customer-facing repair chain may need tighter print placement and higher-cost decoration. A budget internal maintenance program may accept a wider tolerance if durability is still sound. The wrong decision is paying for tight cosmetic control while ignoring seam strength, or choosing the lowest decoration cost and then absorbing complaints from branches.
For buyers comparing manufacturer capability, company background and sourcing process transparency matter. A supplier’s ability to explain print mapping, quality control, and production limitations is often more useful than a low opening quote. Background information about Fabrikn can be reviewed at Fabrikn’s about page.
The best sleeve print map is not the most complicated one. It is the one production can follow and inspection can verify. Buyers should avoid over-specifying details that do not affect the final result, but they should be strict about seam clearance, artwork direction, and durability checks.
For a first repair chain order, a conservative decoration strategy is usually better. Use a proven sleeve position, avoid printing across seams, choose a decoration method compatible with the fabric, and approve a full garment sample before bulk. Once the supplier has demonstrated repeatability, the buyer can consider more complex forearm graphics, reflective elements, or multi-location sleeve branding.
Cost tradeoffs should be reviewed honestly. Screen printing may reduce unit cost at volume, but setup and color changes can make it inefficient for many branch variations. Heat transfer may be better for variable names or small batches, but it needs strong bonding control. Embroidery may elevate perceived quality, but it can pucker lightweight sleeves and is not ideal for large graphics. Reflective prints can add function, but safety claims must be handled carefully.
Seam strength should not be sacrificed for decoration. If the sleeve construction is weak, a perfect print will not save the uniform. Buyers should review the garment as a working product, not a decoration surface only. The technician’s sleeve is exposed to movement, washing, abrasion, and customer visibility. The approved print map must account for all four.
A strong supplier should be able to answer these questions before production:
If the supplier cannot answer clearly, the buyer should slow down approval. A missed delivery date is painful, but a chain-wide uniform issue is worse. Poor sleeve placement becomes visible in every branch photo, every service visit, and every reorder complaint.
Sleeve print maps are practical control tools for repair chain uniform buyers. They link branding, production, seam strength, inspection, and reorder consistency. When the map is clear, the supplier knows where to print, the inspector knows what to measure, and the buyer has a defensible approval standard.
The strongest review process starts with the actual garment. Check sleeve construction, fabric behavior, seam strength, and decoration compatibility before approving bulk. Then lock the print map, sample, tolerance, and wash expectations. This approach reduces placement disputes, print failures, and field complaints.
Repair chain buyers should treat sleeve decoration as part of the uniform’s working performance. A sleeve logo is not just a brand mark; it sits on a high-movement part of the garment. The right print map protects both appearance and durability.
Get a free quote from Fabrikn — your trusted B2B clothing manufacturer with 10+ years of experience. MOQ as low as 200 pieces.
Get a Free Quote →A sleeve print map is a technical guide showing where sleeve decoration should be placed. It usually includes artwork size, sleeve side, distance from seams or hem, print direction, colors, and tolerance limits.
Seam strength matters because sleeve prints sit near high-movement construction areas. Poor placement near seams can cause cracking, peeling, puckering, or distortion. Weak seams can also fail during wear and washing, even if the print looks acceptable at first.
A common planning range is 10-20 mm from major sleeve seams, but the correct clearance depends on print method, seam bulk, fabric type, and artwork size. Heat transfers and embroidery often need more caution than flat screen prints.
Typical MOQs may range from 20-100 pieces for heat transfer or embroidery programs and 100-300 pieces for screen printed batches. Custom cut-and-sew uniform programs often start around 300-1000+ pieces per style or color. Exact minimums depend on supplier setup and material sourcing.
No. A flat proof is useful for artwork review, but it does not prove sleeve placement, seam clearance, stretch, or print durability. Buyers should approve a decorated garment sample or at least a production-equivalent trial before bulk.
Screen printing is often efficient for larger consistent runs. Heat transfer works well for smaller batches, branch variations, and reflective marks. Embroidery suits compact premium logos on polos or jackets. The best choice depends on fabric, artwork, order size, and durability requirements.
Inspectors should check placement drift, rotation, poor opacity, cracking, transfer lifting, seam puckering, skipped stitches, dye migration, heat marks, sleeve twisting, and shade variation. Bulk goods should be compared against the approved sample and print map.
Yes. A saved sleeve print map gives the buyer and supplier a repeatable standard for future production. It reduces the risk of reorders arriving with different placement, artwork size, or sleeve direction.