A practical retail operations guide for validating sleeve print maps, fabric compatibility, and production risks before bulk decoration starts.
Retail teams that source decorated apparel often focus on artwork approval, brand color, and delivery dates. Those matter, but sleeve print placement deserves the same level of control. A sleeve print map testing guide helps retail operations teams confirm where graphics sit, how they behave on different fabrics, and what can go wrong before production runs scale up.
This is especially useful when working across tees, jerseys, fleece, woven overshirts, and blended fabrics. Sleeve graphics can fail in ways that are easy to miss on a flat sample: distortion during wear, cracking at the elbow, poor ink opacity on dark bases, or misalignment caused by seam construction. A practical testing process reduces returns, rework, and store-level complaints.
Sleeve Print Map Testing Guide for Retail Teams - Fabrikn production reference
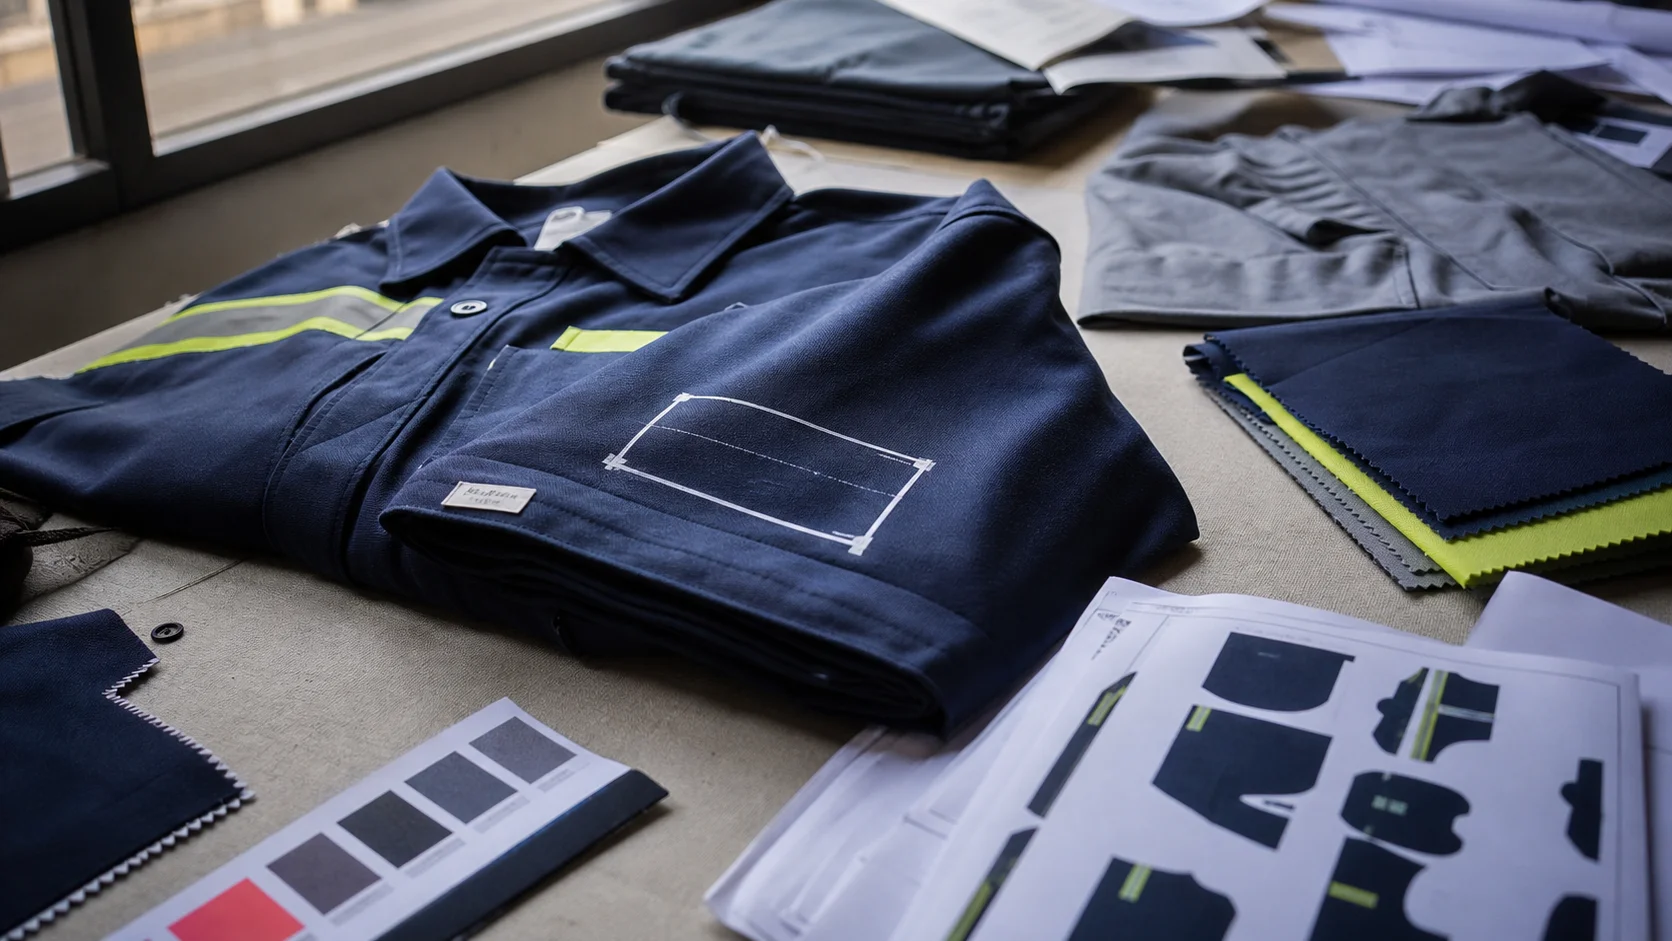
A sleeve print map is the placement plan for artwork on a sleeve, usually shown against key garment reference points such as shoulder seam, cuff edge, side seam, and armhole. Testing the map means checking whether that placement still works once the artwork meets real fabric, actual garment construction, and expected movement in wear.
For retail operations teams, the goal is not only visual alignment. It is repeatability. If one size lands correctly but another drifts, or if a graphic looks centered on a size M but rides too close to the elbow on an XXL, the result is inconsistent merchandise that can weaken the collection.
Sleeve print placement should be treated as a construction issue, not only a design issue. The garment moves, stretches, and curves. Artwork must be tested against those realities.
Sleeve decoration is one of the more sensitive print placements in apparel. Unlike a chest print, a sleeve design interacts with seam lines and motion. Retail teams need a testing process because even a strong artwork file can fail when applied to the wrong fabric or positioned without accounting for pattern variance.
There are four common business reasons to test sleeve print maps carefully:
Retail buyers should also remember that sleeve prints can create cost pressure. Larger prints consume more ink or transfer material, while intricate placements may need extra labor in setup and inspection. A poor testing process can turn a profitable decoration concept into a high-rejection program.
If your team needs support on decorated apparel production, review the options outlined on Fabrikn services. For sourcing discussions or project questions, use the contact page. Background on the company and capability range is available on the about page.
A useful sleeve print map starts with garment measurements, not artwork alone. The map should define print position in relation to fixed garment landmarks. Typical reference points include shoulder seam, sleeve cap, bicep midpoint, outer arm seam, and cuff edge.
The best maps are simple enough to be followed by production teams and precise enough to avoid interpretation. Retail teams should avoid vague instructions like “center on sleeve” unless the brand has a defined, measurable centerline based on pattern data.
A supplier should receive a clear decoration page or artwork sheet that includes the intended placement on all relevant sizes. If the program covers multiple styles, each style should have its own sleeve print map because sleeve shape, cuff construction, and fabric behavior can differ more than expected.
One practical point: ask for a print placement sample on at least one size that represents the bulk of the order. If the main volume sits in medium to large, testing only a small sample can hide balance issues that appear on larger grades.
Sleeve print map testing is incomplete without fabric testing. The same artwork can perform differently on cotton jersey, ring-spun cotton, poly-cotton blends, brushed fleece, French terry, and performance knits. Fabric structure affects ink penetration, transfer adhesion, hand feel, and stretch recovery.
Retail teams should insist on testing the actual bulk fabric or a very close pre-production substitute. A mill handfeel swatch is not enough. Garment fabric may be finished, washed, dyed, or treated differently from lab references, and those differences can change print behavior.
For dark garments, ask for a specific review of underbase opacity and migration resistance. On polyester or poly-rich blends, sublimated colors or heat-reactive dyes can create hidden risk. A sleeve print may look acceptable at first pass and then shift after heat exposure or washing. That is the kind of issue that stores notice quickly.
Different decoration methods bring different tradeoffs. Retail operations teams should judge the method based on volume, fabric, target price, and acceptable risk level.
Screen printing is often a good choice for larger volume sleeve graphics because it can be cost-effective and durable. The tradeoff is setup complexity. Fine detail, small type, and wrap placement require tighter control. On stretch sleeves, heavy ink deposit can crack if the garment is strained.
Transfers can offer sharper detail and flexible positioning. They are useful for short runs and multicolor art. The risk is edge lifting, poor wash performance, or a slight plastic hand feel that retailers may not want on premium products. Testing should include washing and abrasion checks, especially if the print sits near repeated fold lines.
Sublimation works well on polyester and certain light-colored garments. It gives vivid color, but fabric selection is narrow. Sleeve maps must account for seam alignment because the print is often applied before garment assembly or on cut panels. If the pattern is not controlled, the visual result can drift after sewing.
Some sleeve programs use embroidery, puff accents, or mixed decoration. These can elevate perceived value but increase the risk of puckering and placement inconsistency. Heavy stitch density on a curved sleeve can distort the fabric or create unwanted stiffness. Testing should confirm whether the decoration interferes with drape or comfort.
When selecting a method, retail teams should think beyond decoration cost. A slightly cheaper method can become expensive if it produces high rejection rates, late approvals, or margin loss from returns.
A disciplined sample approval process is the most reliable way to test sleeve print maps. Retail teams should not rely on a single image proof or a flat mockup. The sequence should move from digital approval to physical sampling to pre-production confirmation.
A good approval form should record exact measurements from seam to print edge, print size by size, and any exceptions. If a buyer approves a visual sample without measurements, the production team may have too much room to interpret the result differently.
A sleeve print approval should be written as a measurable standard. Visual approval alone is too easy to misread later in bulk production.
Retail teams should also decide whether the same print map is acceptable across the full size curve. For some designs, sleeve print position should shift slightly by size to preserve balance. For others, especially logos, a fixed position may be better. The decision should be made before bulk approval, not during production firefighting.
MOQ expectations depend on decoration method, fabric type, and the supplier’s setup structure. For retail teams, the practical question is not just “What is the minimum?” but “What minimum still lets us test properly and protect margin?”
Lead time is affected by artwork finalization, strikeoff approval, fabric availability, trim sourcing, and production queue. Sleeve print testing can add time if the team requests multiple revisions. That delay is usually worth it when the product is tied to a retail calendar or seasonal launch.
Retail buyers should build in buffer time for re-sampling when dealing with stretch fabrics or dark substrates. A “quick approval” often becomes slower if the first sample reveals placement drift or print cracking. Better to absorb that time early than to rush a poor bulk run.
Inspection should focus on issues that are specific to sleeve graphics. A garment may pass a general check and still fail as a retail-ready decorated item.
Inspection should include both flat measurements and on-body checks. A sleeve can look acceptable on a table and still feel visually off once the garment is worn. For retail operations, that is not a minor difference. It affects shelf appeal and customer confidence.
It is also smart to check packing and folding methods. Sleeve prints can crease if folded aggressively or stacked under heat. Some finishes recover well, while others retain a visible line. If a program uses raised inks, foil, or puff effects, handling damage risk is even higher.
Retail operations teams can use a short checklist to control sleeve print map testing without slowing the program unnecessarily.
That checklist is simple, but it prevents the most common mistakes. The bigger the retail rollout, the more valuable disciplined testing becomes. A sleeve print that looks minor in development can become a visible quality signal at shelf level.
Retail sourcing teams should not treat sleeve print testing as a decorative extra. It is part of product risk control. The right decision is usually the one that balances brand presentation, unit cost, and repeatability. In many cases, that means paying a little more for a clearer sample process or better-performing print method.
When a program is highly promotional and price-sensitive, a simpler print method may be the better call. When the garment is premium, limited edition, or heavily dependent on visual finish, stronger testing and more robust decoration usually make sense. The mistake is choosing a method first and asking the fabric to adapt later.
For teams that want supplier support during development, a structured sourcing conversation is worth having early. Review the service scope at /services/, and use the contact form when you need to discuss sampling or production planning. If your team needs more background on capabilities and company structure, the about page is a sensible starting point.
Get a free quote from Fabrikn — your trusted B2B clothing manufacturer with 10+ years of experience. MOQ as low as 200 pieces.
Get a Free Quote →It confirms that the graphic lands in the correct position on the sleeve and still performs well across wear, wash, and production variables.
High-stretch knits, brushed fleece, and polyester-rich fabrics can be more demanding because they affect adhesion, color stability, and distortion.
At minimum, one physical sample should be reviewed, but complex or high-value programs often need a strikeoff, a corrected sample, and a pre-production sample.
It depends on the method. Screen print runs often start in the low hundreds, while transfers can be lower. Unit cost and setup fees should be reviewed together, not separately.
Not always. Some designs work best with graded placement to keep the graphic visually balanced across the full size curve.
Placement drift is one of the most visible problems, followed by cracking, peeling, and color inconsistency after wash.
Yes. A good-looking sample can still fail after washing or stretching if the substrate behavior is not tested properly.
Sleeve print map testing is one of the clearest examples of how small technical details shape retail outcomes. When sourcing teams control placement, fabric behavior, and approval standards early, decorated apparel becomes more predictable, easier to sell, and less likely to generate avoidable quality claims.